Pages

Thursday, January 24, 2013

A Study of Moss

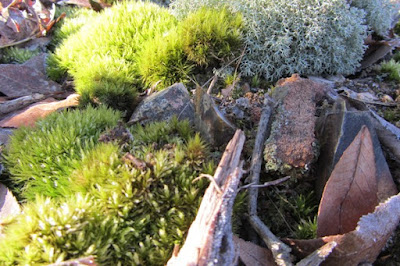
Moss is a quintessential ingredient of fairy tale pictures.  I love the soft textures, the brilliant emerald shades, the pale blue-grey-green of lichens, the tiny red caps some of them produce.  But drawing and painting moss is far more difficult than it would seem.  I am still struggling to master moss.


If anyone has techniques for drawing and painting moss, please share!  I'd love to post a wide variety of  artists' styles.  I have tried different looks, but so far am not especially pleased with any of them.
There is the very vague, watery style:


And the slightly more defined look with ink outlines:


And the draped look over rocks:


But getting good close-up drawings or paintings of moss and lichens is something I really must work on.  My fairies deserve no less than inviting mossy carpets to drape themselves upon, or adorn themselves with, or to have sprouting from their fairy cottages.  So I will work on it and post my results in the future.  Meanwhile I am snapping photos wherever I can.  And, of course, practicing.  The grass fleas of Minglemist have been quite helpful!


Back to the drawing board....


Thursday, January 17, 2013

A Mermaid Place


Here is the result of all the manic paper manipulations.  I love the textured look and the bright colors.  Think I will do some small similar ones while the whole sea world of papers is strewn over the table.  Please comment, I need feedback!  And thanks for looking.

Heidi from under the sea, blub blub, off to search for the mermaid.  Oh and by the way, this is now available in my Etsy shop!

Tuesday, January 15, 2013

Paper Pulping


While the cold continues, I am inside doing more paper manipulations.  It is a sickness.  Currently I am obsessed with pulping up tissue paper and water, then straining it with a flat seive thing I have, then dumping it onto a flat surface, pressing the water out with a towel, poking holes in it with an orange stick, letting it dry overnight, glueing sand or fibers onto it, then painting it.  A lot of work, but it keeps me out of trouble, and the results are pleasing to my sight.  Here is a piece I have just glued sand to:


And here are two painted pieces, one with sand and one with gampi fibers glued on.


If all goes well, I'll have a finished collage to post in a day or two. 


Friday, January 11, 2013

Making Paste Papers

I am collecting ingredients for a mermaid themed collage, and needed some paste papers in blues and greens, so here's how I made them.

My working surface is a sheet of the white siding used in milk barns and greenhouses.  Any smooth surface that's easy to clean will do; plexiglass, formica or enamel tabletop.

I used white, acid free cardstock.  Colors are nice too, just be sure the paper is heavy enough not to shred when wet and worked on.  You will also need various tools to manipulate the paste:


Here is my paste recipe.  There are many others, but this one is cheap, easy to make, and has a nice smooth consistency.

1/4 cup cornstarch
1 3/4 cups water

Mix cornstarch and 1/4 cup water in a saucepan until smooth.  Add 1 cup water and cook over medium high heat, stirring continuously, until it thickens like custard.  Remove from heat, stir in 1/2 cup water.  It will be runny at this point.  Let cool thoroughly without disturbing it.  It will take a couple of hours to rethicken.  Once cooled, strain the paste through a seive, then divide it into small containers - cottage cheese cartons work well.  Stir acrylic paint into the paste until it's as dark as you want it.  2 - 3 teaspoons is usually about right.  You can also leave the paste uncolored and drop colors of paint on top of the paste after it's spread on the paper, as I've shown in this demo.


Brush or sponge the paint so it mingles and covers the paste.  Sponged papers are particularly nice for landscapes and fantasy collages.


For a slightly different look, add paint and paste to another sheet and press the two together, then pull apart.  This creates wonderful lacy designs that look like trees or shrubbery.


You can also brush the paint on smoothly, then draw combs or tools through it to leave marks.  It's particularly interesting to paint a sheet of paper first, maybe with metallic or pearlescent paint, then, when dry, add a dark colored paste over the top.  When you comb through it, the underpainting will shine through, making very colorful, complex patterns.  On the following sheets I've experimented with some shell shapes.


And here is a sponged paper with silver over blue.  Very mermaid-looking, don't you think? 


Lay your wet paste papers over a rack or carefully on newspapers to dry, but if you use newspapers, check a few times to make sure the paste paper isn't sticking to the paper beneath it.  When dry you can either iron the back side or press under something heavy to help keep the paper flat.

The next step is starting on the collage.  Results will follow!


Saturday, January 5, 2013

A Plethora of Papers

 I have been going through my decorated papers today because I have ideas for new ones and simply don't have ROOM for any more!  So I've decided to offer some for sale at my Etsy shop.  Many of them are hard to part with.  Each has a story, and quite a few have been featured in collages I've made.  But it's time to let some of them go, and maybe they'll inspire someone else to create something beautiful.  I hope so!
,
There will be three lots of 25 papers each, varying in size.  The smallest are about 3 1/2 by 5 inches, the largest is 8 by 8 inches.  Most are paste papers, some are crinkled metallics and there are many lovely spattered and sponged pieces, all painted on good quality, acid free paper.  There are even some bubble prints.  I hope to have them in my shop in the next day or two, so if there are any paper lovers out there who love to collage, or make cards, or decorate journals or scrapbooks, these are for you!


Coming soon:  I will share paste paper recipes and techniques when I begin a new batch.

Have a nice weekend!  Heidi

Thursday, January 3, 2013

New Year Activities


Today I did seed inventory, so that means ordering seeds is next on the list.  And all I want to do is draw dragons!  But gardening is our business at On The Wind Farm, and you can't grow much without seeds, so I'll be pouring over the catalogs for the next few days.  But I'll squeeze in some dragon drawing time too.  I'm working on a new one which will appear on my "Tales of Minglemist" blog shortly.  There are dragon scales to fill in, and a giant crusty mushroom to finish, and endless blades of grass springing from a mossy carpet.  Meanwhile, I had my first Etsy sale - hurray!  And I have met some wonderful fantasy artists on two Facebook groups: Fantasy Art and Fantasy Art Promotions.  So the January days are passing, and will be gone all too soon.  Winter is creative time - my favorite!